Thank you for taking time to visit, and I hope I am even a tiny bit helpful as I have been helped and blessed by so many others. I have been doing Calligraphy since teens, and card making for many years as well. In 1990 I delighted in the joys of stamping with ink and embossing after a trip to Cairns, Qld. In 2009 I discovered the brayer, 2010 the Cuttlebug, also have now taking to reading up on crafting blogs and lo! Here I am, on one of my own.

I live on the coast of eastern Australia. I am a Christian. I trusted in the LORD down here at the beach, amazingly it is not far from where I now live. It was over 50 years ago, after a Beach Mission Service at the age of 12 years

Wednesday 27 June 2012

Di's Snippets again + of course WOYWW!!

Hullo there everyone! another Wednesday is in view :D 
 So time to peek at desks around the world courtesy of our hostess and originator of this fun blog hop our Julia of Stamping Ground blog.          Here first of all is my desk...

 You see last week Bridget asked me where my calligraphy was? well, the answer is plodding along in the background. I have no major project on at present. I was re-enthused to do some extra practice whilst visiting my calligrapher friend, Joyce, in Northern Ireland, so here you see my practising. Yep boring,rote practice of alphabet - simple one, ie gone back to basics. It is called Foundational - did it really large, in pencil skeleton outlines, then onto large nib and  pen; then smaller after quite few hours of practice.Oh and Bridget, thank you! see your atc has arrived - to see how gorgeous it is look here! 
And if you can see what I have have written on the page - it is Iris's 80th birthday today so singing her happy birthday - this is lady in question for those of you who may remember - see my gift for her here.

 My nephew's birthday card - the  sketch  was on last week's desk about to be made. Used a scanned copy of the Garfield comic in our local paper. He is a huge fan of Garfield, and even though in his twenties now it still gives him a chuckle. The best bit is Garfield's birthday is the same time of year so there are always appropriate ones to use for a card if  I get organised. The greeting is a rub-on I happened to have that matched perfectly. :D, and the scallop comes from the Nellie Snellen Multiframe die adapted a bit, and Cuttlebug vintage corners. DP is a freebie from Far Hill Freebie papers.


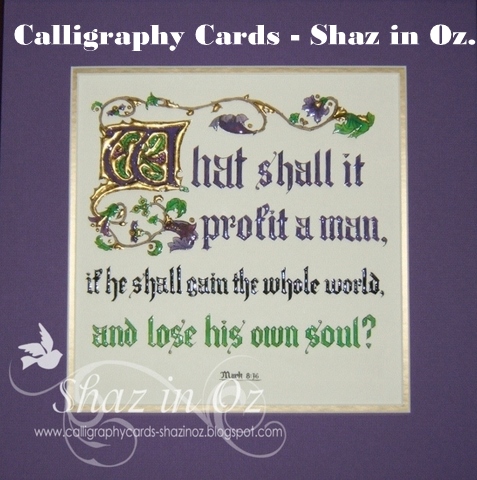
At last you cry, it has taken me two weeks to finish this card - stamping first shown two weeks ago. Di here is my entry for this week's Snippets Challenge. The mauve swirls base was done years ago with my friend's cuttlebug before I had even bought mine. The paper is old photo paper stamped with SU discontinued set - see the method here (Lindsay's blog is simply fantastic well worth a visit - she is a WOYWW-er too). Cut it with Nellie Snellen Oval die and Spellbinder Petite Scallops underneath. The purple mount it is on was a base I ripped off a card cos decided it was wrong shade.
And a very big welcome to my newbie Encouragers - I always find it a blessing when someone cares to encourage in that way! :D

Well that is enough from me today - if you like teabag folding take a peek at the post below - really love it and these two cards below came it all okay which made me very happy. Funny isn't it how you literally wrestle sometimes to create a decent one!??

Happy WOYWW everyone and thanks so very very much for popping over for a peek and a chat. May God bless your day wherever you may be!.
Shaz in Oz.x

Monday 25 June 2012

Teabag Folding Music Cardlayer - Cardmaking Online DT Project

Hullo there everyone, let me share with you some new teabag folding cards made for Cardmaking Online Blog - it would be lovely if you would also kindly take the time to pop over to our blog - or even stop and say hi! :D {actually if you do go over would you please let me know if they have word verification on p;ease as Sandra from Stamping with Pleasure said they did and would like to know, as its not on when I comment - thanks!}
 These make really good male cards, which are not always easy to decide on.

 1. The tea bag folding papers have two sizes in the squares. Take eight small ones of the Golden Music teabag  folder paper, carefully cut eight small squares and fold in the traditional star pattern (see here for a good guide). 
2. Paste it all together in the layer pattern you would like best. There are four star patterns formed with this particular folding paper. Each view is different - I liked this one best.  I use glue stick with tea bag folding, as find this least messy.
3. Cut a circle from co-ordinating colour scrap card to match the size of the teabag with Nestabilities Classic Scallop Circle Small S4-125 . Then cut a black scallop with corresponding size die with Nestabilities Classic Scallop Circle Small S4-125,  and emboss both of these with the tan mat  and embossing machine.
4. Mount teabag on top of circle with double sided (DST) tape.  Add scalloped mount + teabag with DST to cardlayer. Cut brown card to size and adhere to the cardlayer.
5.Use brads at the top to match brown card and a black ribbon at the bottom of the card layer. . Attach black card base to finished top section of card to it. To finish add a gold Happy Birthday peel off greeting to top right corner.
  Items used
.
Also available in this  teabag folding paper is the Music Blues Tea Bag Folding Paper,  and here is another variation with same card design.

  1. Using this time the large teabag pattern on the sheet cut out four squares fold as before in card above. Then  when you come to step 4 of the folding, take it the extra folds as shown bringing the top two triangles in to along in the centre (step 5). Bring the tips down to meet with the top and pinch them open (step 6).
  2. When you have the four completed pieces, paste them to a scrap piece of card. Trim it in the shape of a square so none of the base card is showing (5 x5 cm). Attach a pearl brad to centre.

3.Then take another of the Luxury Card Layer A6 - Ivory Music Notes and spray with a suitable spray.
Used is a blue mist and silver mixed together to get this colour (eg Perfect Pearls Mist - Perfect Pearl and Perfect Pearls Mist - Forever Blue 60ml. 
Allow to dry.

TIP: Then to flatten the card layer after spray has dried, use a DRY (not steam setting) iron, and iron it between two sheets of Non Stick Oven bake paper (not waxed paper) with a standard iron on low temperature. Not many of us have a craft iron, but most of us have the non stick paper in the kitchen, and a regular iron. You need to use it dry though as steam affects it.
4. Then mount the coloured music layer on some deep blue card to match the size of the card you want to make, and also attach to black card base with double sided tape (DST).
 
with permanent black and blue textas (as shown in the post here).  
6.Attach the mounted square teabag with DST to the lower right of the music cardlayer and then add the greeting to the top right at suitable angles.
Added also were some small black rhinestones in the corners of the cardlayer.
And another lovely teabag card is completed.
Items Used:
Thanks so much everyone for stopping by for a peek and a chat...and may God bless your day wherever you may be,
Shaz in Oz.x
PS for those for those of you keen to try this out for your selves this is a really great video here.

Wednesday 20 June 2012

Di's Snippets Challenge and WOYWW

Hullo everyone. Here we are, another week and we are halfway though already! So tis time for WOYWW or What Is On Your Workdesk Wednesday. So do please join us at Julia’s wonderful blog of the Stamping Ground to sticky beak peek at the glories of desks of the world!
Here is my desk today - mm, there is top left a card outlined there (with printed Garfield comic - he likes him:D). I hope to get my nephews card done today too seeing as his birthday is in a couple of days, plus some software to download!
And yes, some of the remnants of last weeks work there - I know! Di that snippet card is not finished but hey, have finished another instead so will enter this on in Di's snippets Challenge and so can now join the fun in the play ground!! woo hoo here I come!!
Did that bit of brayering and stamping months ago and threw it in the scrap box as one side I did not like! Then thought why not cut it off and used another bit if scrap black to mount, The cream cards - well hate to think how long I have had that set and never ever used before, and just scored a wee frame around it - simple!
Here are some pickies I took yesterday on my walk down to the beach 5 mins from here. We are being blessed with the most amazing winter weather it is about 18C each day and down to 9C at night or so and I just love all this sunshine from the LORD - let me share it with you!
The creek mouth has changed yet again in the last few weeks!

There have been some very large seas with king tides of late, and these have brought up lots of extra treasures. Lots of shells on the beach, plus some other sea critters - this is "cungy-boy" as we call it and they live on rocks and attached to the timber structures of our jetty. They squirt water out at low tide to help with breathing when not under water. I think it is a colloquial name as Google brought up very little on it, but have called it as long as I can remember by that name.
This is a large dinner plate sponge!
Low tide at the creek, late afternoon reflections.

That's all from me today off to do some more jobs (and maybe finish those cards)!
Thanks so much everyone for popping over for a peek and chat and may God bless your day wherever you may be.,
Shaz in Oz.x

Wednesday 13 June 2012

WOYWW - Mm, comes around so fast - yep Wednesday it is!

Hullo there folks one an all here is is Wednesday again - the blink of an eye so time to fess up and show us your desk and link over to our Julia's desk the Queen of What is On Your Workdesk Wednesday!
Mm, my desk okay it is tidy again but that is only cos the cleaning lady was here yesterday and dining room table needed cleaning up!

On my desk you can see the leg of some pants I was shortening and then depilling ( that's really why my sister put them out, not cos they were worn out! see depiller on table too).
You see, sisters are very handy for getting very good quality clothes for nicks (nothing) and then using money save for stash :D  To the left on chair (which you cant see)  are two more items needing such attention, so the sewing machine which is also away will come out again.
Isn't Jo clever?? see three WOYWW's on her card? the number three on the door too - our 3rd anniversary, thanks JO!
My very most favorite -est item on this table is my adorable dumfling - I am totally besotted by these creations, which is of course an atc from the hands of Jo! Thank YOU, Jo, so very kind of you! 
Clever Neet kindly sent an atc too! dont you love the multi stamp and embossing powder.
And then not on the table (in pickie above) but arrived just now in the mail (yahoo!) is the atc from Neet! Notice the dear Queen stamp on her envelope! Neet's atc is using the "beloved-but-not-yet-possessed-Pan-pastels". To be perfectly honest they will have to come down way down in price for them ever to make the bought list. They are way out of my budget at present.
I wasn't going to participate in atc swap, as was away when all this was announced but these two kindly sent me one and think another one is coming from South Africa too - and girls yours are coming, a bit slow cos never made them and had one major mental block! and a full reject pile!!

Also today is new method played with - see on post over here on the Frugal Crafter - Lindsay's blog. I must confess  must be one of my top crafting blogs! great post this one.I have her posts emailed to me and she has lots of ideas of using things you already have rather than rushing out and buying the next "must have" item. This was in this category and is using watercolour pens. I used Tombows (bought in 1995!) but she used Stampin' Up I think - but use whatever you want and it takes no great skill!
If have time I will finish this effort and put in Di's snippets challenge; as it was scrap photo paper, plus the purple mount is scrap too as you can see on cuttlebug - so watch this space, Di I might get to play in the playground this week after all ...well off to do some jobs!

Thanks so much everyone for popping over for a peek and chat and may God bless your day wherever you may be.,
Shaz in Oz.x

Saturday 9 June 2012

Nellie Snellen Square Textile Rose - Cardmaking Online DT Project

Hi there everyone!
  Here is another post for the Cardmaking Online Design Team.
Please (pretty please:D) do pop over to our blog and leave a comment on the post over there - just so that they know that you have been over (thanks so VERY much to those who have).

This is the second post using the very versatile Multiframe dies by Nellie Snellen, the Square Stitched die .  For first example please -  click here . You can chose how many or how few pieces to use with very differing results.
1. Chose greeting for your card and stamp/print on good white card. Peel offs would be easiest for this but need to be the right size for the small die. I used a computer generated greeting.

2. Take the middle section of the die, marked A. above, and emboss the die pattern on the greeting, using the tan mat in Big Shot/ Cuttlebug embossing machine. (Do NOT cut - just emboss)
HINT: Test this embossing step out on a scrap piece of card as it helps to line things up well, and sort out how much pressure to use as too much will spoil it.
3.Use a flat ink applicator and ink evenly the exposed areas of the die cut (I used a sponge applicator) with ink of choice. Make sure you dont make it too dark, and hide the writing -I did on first one!

4.Cut out a large white card frame with the outside Square stitch die and the larger scallop marked B. in photo above.
5. Using 3D mounts place carefully the frame on top of the inked smaller inside square greeting to frame it beautifully.
Spray lightly with Diamond Dust Glimmer mist if desired.
6.Choose patterned paper from stash to size of card you are making (used the very lovely glittery Papermania A4 Paper Pack Henbury Lane) and mount on the card of choice.
Then  add frame mounted on more 3D mounts, as shown in first photo.
7.Add across the lower section of almost completed card some delicate lace from Kaisercraft Lace Pack - White. Add three clear bling to the end to complete your first card! 
Materials:
Lavender dye ink pad,
Greeting of choice.
 
1.Take the Cuttlebug Textile Embossing folder and ink it up on the positive side (the side with the name on it Cuttlebug). I used a lavender ink but could have used the Adirondack Light Cool Peri. 
HINT: If it is a light ink, you can just rub the ink pad over the surface to get a good coverage.
However when it is a dark shade (like here) use a brayer, for more even coverage.
2.With Big Shot emboss a piece of white card to make a lovely sheet of mauve embossed card.
3. Chose a computer generated greeting "Thinking Of You!' printed in black on white card.
4. Take the smallest Square Stitch die from the Nellie Snellen Multiframe as shown above
Cut the greeting and then emboss with tan mat. Make sure you leave the cut and embossed card IN the die, for the next stage.
5. Ink evenly the exposed areas of the die cut (I used a sponge applicator) with the same ink used on the folder. Make sure you dont make it too dark, and hide the writing -I did on first one! 
Spray the Textile embossed sheet and the Nellie Snellen Square with  favourite -  Diamond Glimmer mist.
6.Mount on Textile die in centre approximately. Add roses of choice like the Fuchsia ones at CMO, at top right, with little silver thread and ribbon.
7. Cut lace edge die (similar to Marianne designs lace )and attach it with DST to the bottom of f textile cardstock
8. Attach with DST(double sided tape)to Mauve card stock; then onto white card.
Ingredients:
White and mauve card, Computer generated greeting, sponge applicator, Diamond Glimmer mist, silver thread and ribbon.
Thanks so much everyone for popping over for a peek and chat and may God bless your day wherever you may be.,
Shaz in Oz.x

Wednesday 6 June 2012

What Is On Your Workdesk Wednesday?

Well wha' d' ya know?? its WOYWW time again already so please pop on over to the "Stamping Ground"and check out other bloggy desks courtesy of Julia!!
 No cards of my creation showing on my desk - but I have posted over on the Cardmaking Online DT  blog ( please click here ) ! I would so appreciate if you have time to pop over and kindly leave a brief comment so they know you have been there! thanks so much.
Here is some more of loot from trip to UK this time from dear Joyce Across the Pond (Crafty Quills). I flew across to spend some time with here and her hubby and we had the best four days! was really spoilt, taken everywhere and the weather was really blessed of the Lord when we went to the Giants Causeway!
Monkey was totally impressed with all this loot! Here is more scrummy  ribbon, lace etc. - all from Joyce.  Including the copy of the painting of the castle, (we visited near where she lives) Castle Killymoon - isn't it beautiful?  Plus two cards, the one in mauve was decorated inside with  this lovely verse in calligraphy  and then envelope (it was posted to me in Manchester) was something to behold! the sign at the top left was the one she was holding up at the airport! Thanks so very much dear friend Joyce, and also to Robert who kindly chauffeured us over so many miles!
Happy WOYWW and thanks everyone who has popped over for a peek and chat - may God bless your day wherever you may be!
Shaz in Oz.x
PS. I have so enjoyed the Diamond Jubilee will share few pickies I photographed of the Thames on the TV on early Monday morning here!  mad I know but dont look if not interested - I think our Queen is so wonderful and thank God for a faithful soul like her! What a trooper to stand in that wind so long with her faithful spouse by her side! I pray for a speedy recovery for Prince Phillip.

Okay think this might be an Aussie boat, dont you? yay!
And here we have Princess Royal afloat with her hubby, Commander Tim Kirk!


Raising the Tower Bridge - quite a sight!
Awfully smashing party, Mumsie!
Long may she reign over us, God save the Queen.

The ones below are of the parade to the Palace from early this morning our time. Blogger wont let me put captions on them!
 First is the royal wave as the the fly past of spitfires comes. 
Then my favourite is the last - her look of pure joy as they pass over!


Saturday 2 June 2012

Why does God let Sad Things Happen?

(WOYWW post below this one - sorry! :D)
Recently I heard a very sad story of a friend's nephew, her sister's son of five years, full of life and verve, died tragically one night in a fire on the new property to which they just just moved.

One wonders at such a time, why does God allow such things to happen?

As all too often it occurs, it came up in my reading for the day, from the Daily Bread.
"When the Journey gets Tough:

 In August 2009, Blair and Ronna Martin lost their energetic 9 year old son Matti when he was dragged to his death by a family cow. I met with this family in Alaska, to share in their grief. I know how tough this has been for them.

I also know that they are seeking God's care and comfort for their pain. An observation made by Matti's mom is valuable for anyone walking though one of life's valleys. During one of her down times Ronna was reading 2 Corinthians 1:9 which says the "We should not trust in ourselves but in God who raise the dead." She felt as if Jesus was telling here "Ronna I know the journey is too much for you, and you are bone weary. Do not be ashamed of your exhaustion. Instead see an opportunity to let me take charge of your life."

When the journey gets too tough to navigate, 2 Corinthians 2:19 is reminder we do not travel alone. We have the Help of One Who showed His power in the resurrection, and Who will demonstrate His power again when He raises believing loved ones of all generations to eternal life. "My Strength and Hope have to be in Christ alone", Ronna said. "That's a truth we all need as we travel the journey God has for us.

The storms of life remind us to take shelter
in the loving arms of our Saviour.

~ by Dave Brannon (who incidentally lost his teenage daughter to a car accident when she was 17 years - no doubt that was why he came to this family)".

 So the above, in part, answers the why? We each of us have pain, grief and sorrow in our lives for differing reasons, just as God made us all different.
{I wrote  this verse above, Nahum 1:8 on my leg cast, broken one Christmas, while caring for my ill mother -  and then I asked why? }

Really some things we will never really understand or see clearly the why, this side of eternity. In a person who knows the LORD, it can be to help us grow and as says in 2 Corinthians 1:4  - the comfort wherewith God has comforted us, we can comfort another...maybe by simply being there, as Dave Brannon was and listening. Or if we do not know the Lord yet, it may simply to get our attention, to cause us to seek Him.  

People think it is wrong to seek God when they are in trouble, but this is Satan's lie.
God loves us and wants us to call out to Him. He would never have sent His Son to die on a cross for the sinful world of men and women if He did not care for each and every one of us. 
Human hands lit the fire and let the cow out to the loss of those above, but God did allow it to happen.
His wisdom and His ways are not ours. He longs to know each of us personally, and to grow in this knowledge of Him as Ronna found out.
This is a poem which has always been a great comfort to me. This week I shared it with someone going through a trial in my comment on their blog. God reminded me I had scribbled this post down a month or so ago on piece of paper and not shared it yet.

 The Weaver
 My life is but a weaving between my Lord and me,
I cannot choose the colours; He worketh steadily.

Oftimes He weaveth sorrow, and I in foolish pride,
Forget that he sees the upper and I the underside.

Not ‘till the loom is silent and the shuttles cease to fly,
Shall God unroll the canvas and explain the reason why.

The dark threads are as needful in the Weaver’s skilful hand,
As the threads of gold and silver in the pattern He has planned.

Behind my life the Weaver stands and works His wondrous will,
I leave it in His all- wise hands and trust His perfect skill.
 Author unknown
 I pray for you who are reading this that you will seek the LORD in whatever it is that you are going through. God created us with a free will.
He will answer if we call. He will be that stronghold in the day of trouble - but only if we we ask.
May God bless you in whatever sorrow or hard path you are walking, 

Love  and praying for you in Jesus name,
Shaz in Oz.x

PS do remember this is a very simplified treatment of a very complex subject - and so any questions please
 ask me further via email link on my profile page or comment and ask me to email you.

I also would like to link this over to Word Art Wednesday. I have actually done an illuminated text of the verse, but too long ago to have very good photograph of it, may try and edit it, but suspect it is beyond it.
Also want to enter it in the Little Birdee Blessing Thursday competition too.
The photo of the bird with Bible verse is an Australian bird in my garden called a Noisy Minor - because
they are noisy! but so cute. They nest in the large neighbour's tree  - they love to feed on the flower of this Geisha girl.
Related Posts Plugin for WordPress, Blogger...